We’re introducing a new Extra Features Pack feature In MIDI Designer 2.5 (coming in Fall, 2016): Display Zero. This feature allows you to specify an arbitrary starting place for the visual display of controls.
Category Archives: Features
Image Panels and Custom Images in MIDI Designer Pro 2
Bounce Back (2nd Press Action for Button Groups)
NOTE: Bounce Back was released in version 1.5.3 [see Change Log], available on the App Store since June 28, 2013
Bounce Back covers two quite different feature requests for buttons groups.
One was to have the option to disallow shutting off the last button, or cause the last button to resend. This is seen here in this user suggestion.
The other was a suggestion from User #1 (Mike Rosenstark) to have to return to the previous on last button press. Apparently, this was a feature on the Digitech PMC 10, although that’s hard to confirm right now (no longer in production).
The feature is called Bounce Back because of this suggestion (and it sounds cool, too). Instructions below.
English
Spanish
Set It Up
- Create a dynamic control (knob, slider, crossfader or the axis of an X/Y pad)
- Make it a supercontrol
- Add all the buttons of interest as subcontrols. Now you have a button group.
- Now use Relationships → Options as Super → Button Group 2nd Press
Options
- Button Shuts Off — second tap turns the selected button off. Now all the buttons are off.
- No Action (Exclusive) — second tap does nothing. After initial press, one button is always on
- Resend (Exclusive 2) — second tap resends on value. After initial press, one button is always on
- Bounce Back to Previous Button — second tap selects previously selected button. After initial press, one button is always on
- Bounce Back to First Button — second tap selects first button in button group. After initial press, one button is always on
- Bounce Back to Last Button — second tap selects last button in button group. After initial press, one button is always on
Control Copies
Control Copies
- Make multiple instances of a control (Actions -> Copy)
- Move them to different pages
- Size and shape them as you need them, including the labels
- Use Relationships -> Other Instances to find copies

Use Super- and Subcontrols
- This is another way to do it, allow for different control types
- The knob is a supercontrol of the slider… as long as the knob has only one subcontrol, the relationship is bidirectional

New Keyboard Shapes in MIDI Designer 1.5.1
New in 1.5.0
Piano Keys
In MIDI Designer 1.5.0. we introduced piano-key shapes in MIDI Designer.

New in 1.5.1: Piano Key Shape (No Cutout)
In 1.5.1, button shapes got an additional key shape to handle your keyboard ending in C. Keyboard shapes allow for all kinds of unique and new possibilities.

New in 1.5.1: Hex Keys
Hexagonal keys have been used in isomorphic or generalized keyboards since Bosanquet’s original investigation in 1875. Isomorphic keyboards have a rich history and present interesting advantages over normal (“asymmetric”) keyboards (read more about Isomorphic Keyboards at altKeyboards).
But hexagonal keys have other uses, too, including the pioneering use in drums by Simmons.
MIDI Designer users will no doubt find creative and innovative uses for hex keys.

More Shapes Coming Soon
Hex shapes and piano keys are just to get the ball rolling. Look for more shapes in the future!
Update for 1.6 (January 2014)
Circular buttons added.
Update for 1.6.1 (Coming in April 2014)
Transpose and Octave Transpose coming out now. This will give your keyboards serious playability and provide some very interesting possibilities.
Hidden Controls in MIDI Designer 1.5.1
Need for Hidden Controls: Super and Subcontrols
Supercontrols and subcontrols handle a lot of situations. Examples include:
- button groups
- supercontrols with a different number of steps or ticks
- supercontrols that “gang” together several subcontrols
- supercontrols that snap subs to a different value
Example: Button Groups
For instance, to get radio buttons, called “Button Groups” in MIDI Designer:
- make a relative controls (knob, slider, etc.) the supercontrol of two or more buttons
- now turning one button on will turn the others off
Consider this example screenshot:

The Problem
The crossfader can change the buttons, but for many users, it’s not necessary.
The Solution: Hide in Performance
In design mode, select Hide in Performance

Now when you switch back to performance mode, the crossfader is hidden.

Other Use Cases
In other situations, or most situation, it’s a subcontrol that you will be hiding in performance mode. While the subcontrol does the actual sending of MIDI messages in most cases, the user does not interact with it.
Take Away
Use Hide in Performance for any situation in which a super- or subcontrol does not need to be presented to the user in performance mode.
Named Ticks, New in MIDI Designer 1.5.1
This article applies to all dynamic controls: Knobs, Slider, Crossfaders, and XY-Pads. Named Ticks is a new feature in 1.5.1 (May 2013). Ticks have always been a feature of MIDI Designer.
Normal Ticks
Before named ticks there were always ticks in MIDI Designer.
By default, a knob has 128 ticks (or “steps,” from 0-127).
Adjust Normal Ticks
In MIDI Designer you can can adjust ticks by adjusting:
- number of ticks for the control
- display min and max of the control
- MIDI min and max of the control
By default, a knob has 128 ticks, a display min-max of 0-127 and a MIDI min-max of 0-127.
You can create a lot of what you need this way.
What You Can Do With Normal Ticks
- Make a full-range knob that goes from -5 to +5.
- Create a half-range slider that goes from 0-500 by 10s.
- Create a crossfader that goes from -10 to 0 and sends 0-127.
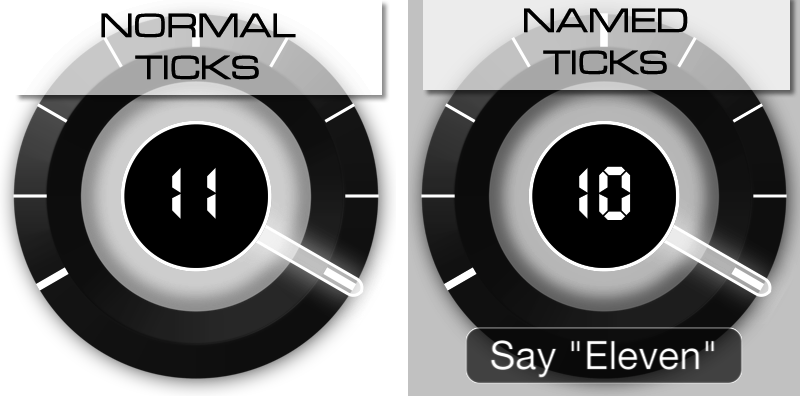
Named Ticks
Named Ticks allow you to define each tick (or “step”) of a dynamic control. Define as many ticks as you need. Each tick has:
- a MIDI value
- a Display value
- a Name
MIDI Designer also provides a rich editor for named ticks. The editor provides automatic re-numbering and direct text entry.
More Than 1000 values in MIDI Designer | Values below -99 in MIDI Designer | Values above 999 in MIDI Designer
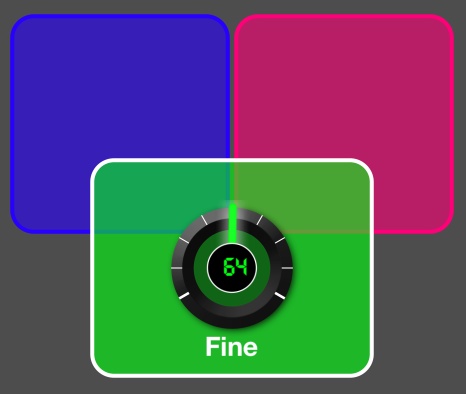
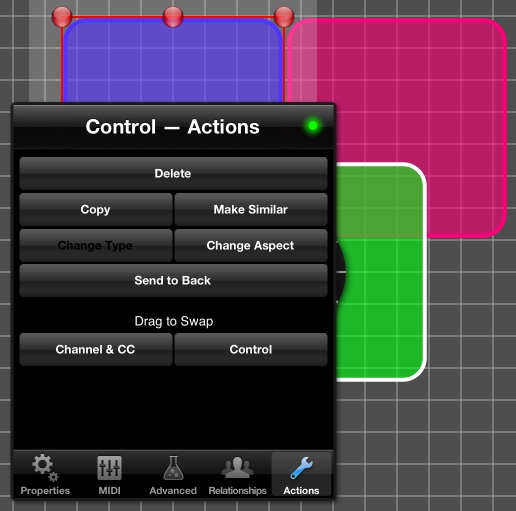
Layering in MIDI Designer
MIDI Designer release 1.5 introduces front-back layering in MIDI Designer. This means, simply, that you can:
- put a control on top of another one (overlapping or completely enclosed)
- consistently layer: your layering will not change in performance mode and is saved with the layout.
How to Layer
- When a control is touched in Design Mode, it is automatically brought to the front
- To send a control to the back, use Actions -> Send to Back
Notes
- On iPad, controls that span both pages cannot be layered behind controls on the right page. This problem currently has no solution and typically affects only one-big-page users.
- Panels do not enter the layering scheme for MIDI Designer. They are always behind controls. If your panels ever appear over the controls, switch pages and switch back. This is a small defect in 1.5 that will be fixed soon.
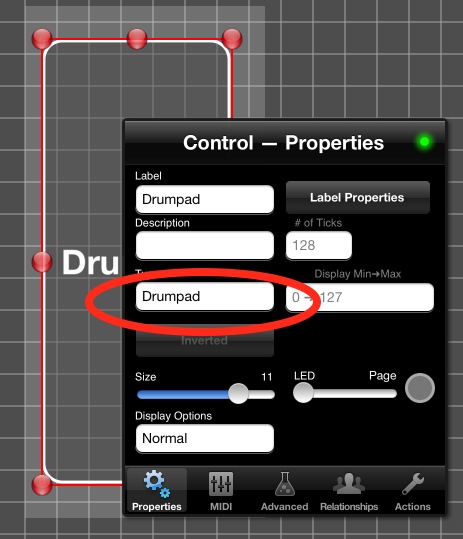
Drumpads in MIDI Designer
In MIDI Designer 1.4.2, we introduced drumpads (Flyer Announcing 1.4.2 Release).
Set It Up
- Create a button
- Set its type to “Drumpad”
Rules
- Tall buttons are louder the higher you touch them
- Wide buttons are louder the further to the right you touch them
- Square buttons are louder in the middle
Video 1 on Drumpads
Video 2 Drumpad Demo
Explanation
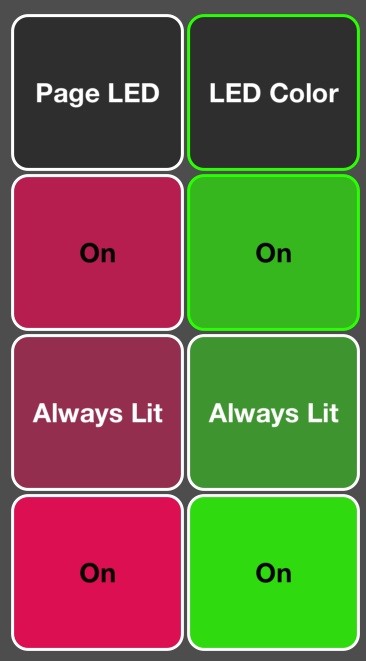
Always-Lit Buttons in MIDI Designer 1.5
MIDI Designer 1.5 introduces several new button features.
Set It Up
- Make a button
- Change its display type to ‘Always Lit’
Note: If the button is always lit, it will take on the same border colors as a button that does not have its own specific LED color. This gives you three specific possibilities (seen here on and off):